

- Chat — an authenticated web chat available inside the Noxus platform (or at a deployment URL) for users in your workspace.
- Widget — an embeddable chat widget you can drop onto any website, letting external visitors talk to the agent.
Both the Chat and the Widget include a built-in conversation history panel — users can pick up any of their previous conversations where they left off or start a brand-new one at any time.
Chat Deployment
Chat is the quickest way to put an agent in front of a user. No setup is needed beyond publishing the agent and choosing who is allowed to use it.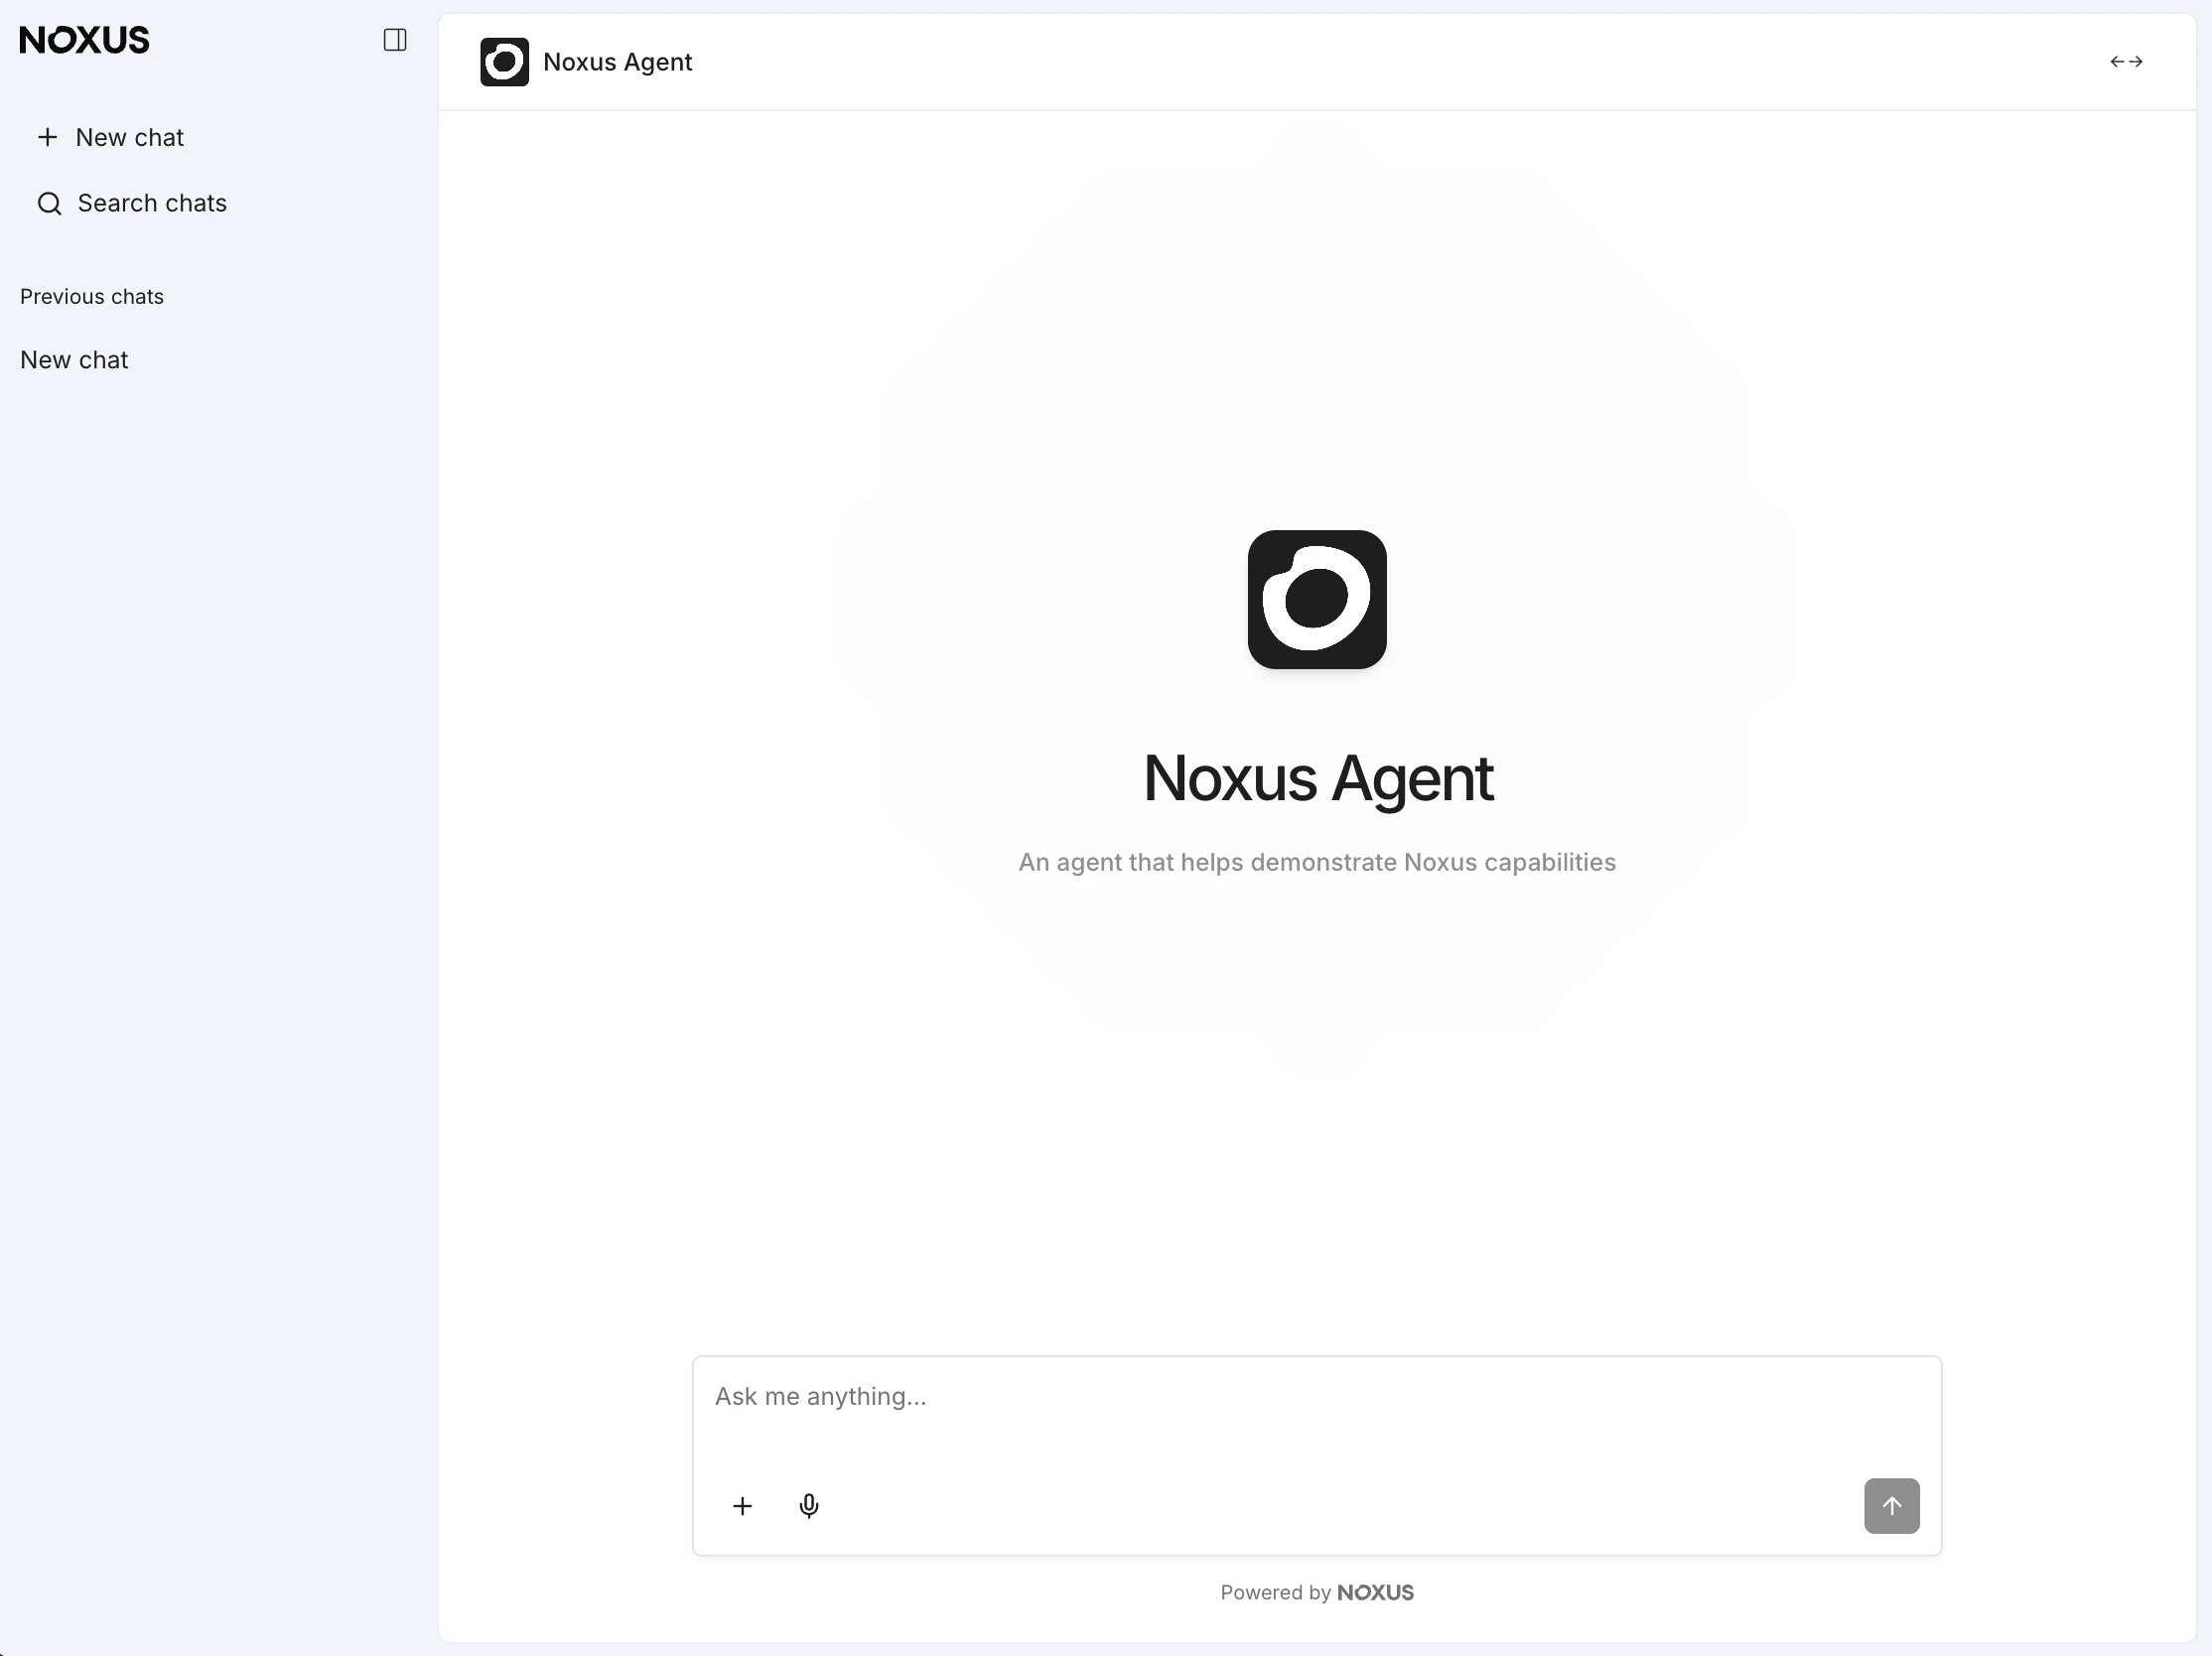
Deployment
A published version is required before you can set a deployment to Online. Switch the deployment to Offline before editing its configuration.
Access
Control who in your workspace can open the chat.Branding
Override the default Noxus look and feel to match your brand.Pick fairly light colors — chat text is rendered in black, so dark backgrounds make messages hard to read. When you edit the main color, the system automatically derives a matching accent color; you can override it afterwards if you’d prefer a different pairing.
Widget Deployment
The Widget is an embeddable chat that can live on any public website. It shares the agent’s configuration with the rest of the platform, but exposes a public front-end that anonymous visitors can use.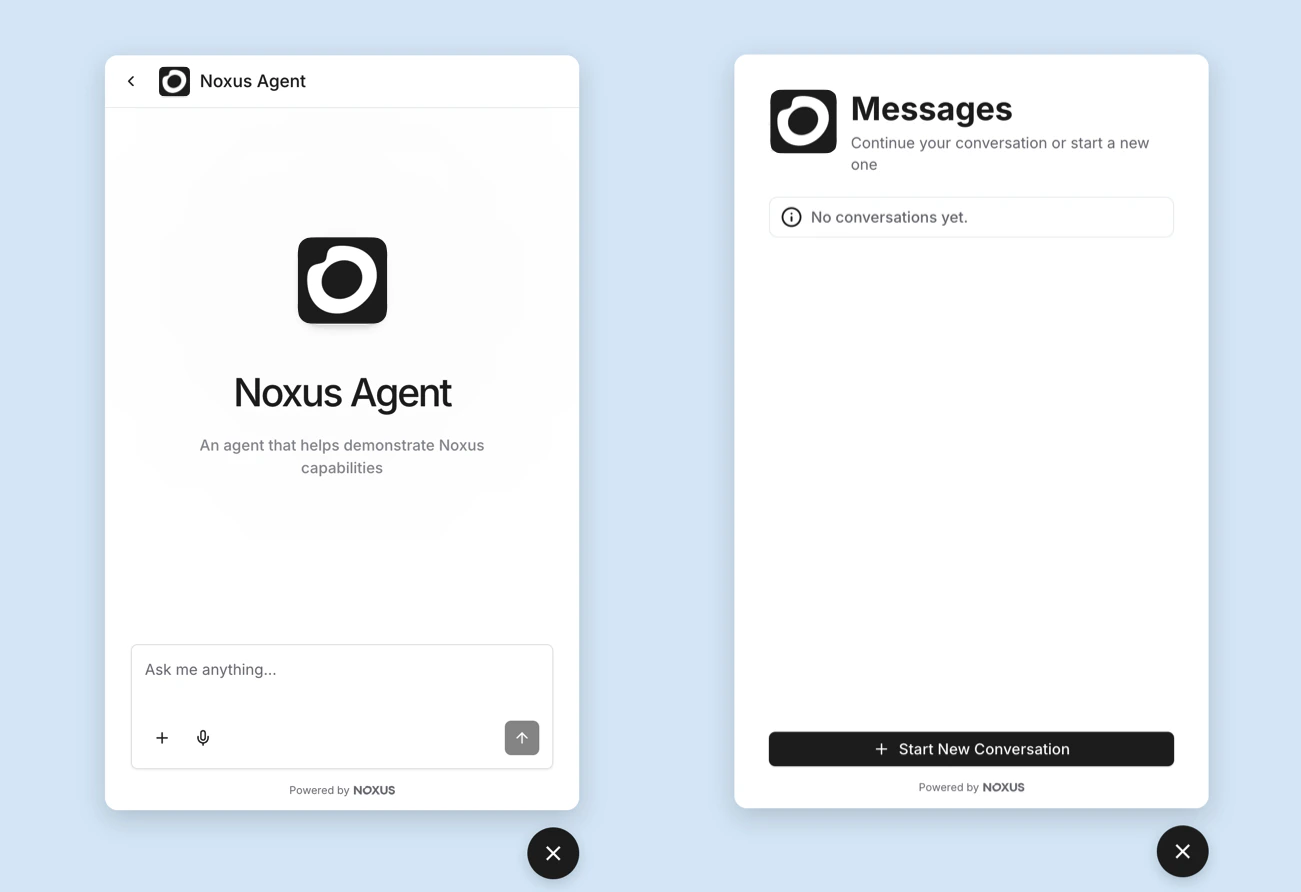
Every label and image shown above is customizable in the Widget content and Branding sections as described below.
Setting Up the Widget
1
Create a Widget deployment
On the agent’s Deployments page, create a new Widget deployment and publish a version.
2
Copy the embed snippet
Once the deployment is Online, Noxus generates an embed snippet you can paste into your website’s HTML.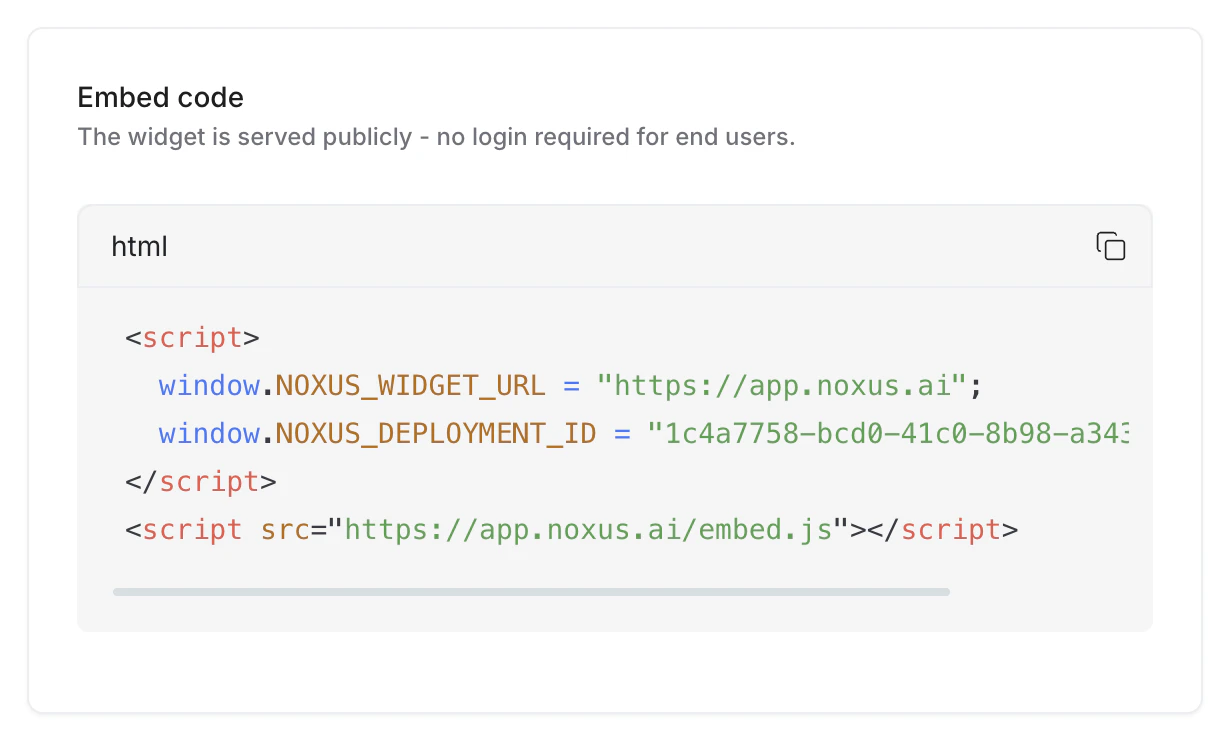
3
Paste the snippet on your site
Add the snippet to any page where the widget should appear. Visitors will see the chat bubble in the corner and can start a conversation without signing in.
Deployment
Widget content
Copy shown to visitors in the widget UI. Every field is optional — leave blank to use the defaults.Position
Where the bubble sits on the host page before a visitor moves it. Each axis has an edge and a distance from it.
The defaults — Bottom, Right, both distances
20 — leave the widget exactly where it has always sat. A gap is pulled back on screen on small viewports, so the widget can never end up off the page.
Changing any of these takes effect on the next page load. The embed snippet does not need to be pasted again.
A dragged widget is never remembered: any page load — a refresh, a link, a new tab — puts it back where this page says.
Branding
Access & security
By default the widget is fully public: it can be embedded on any site and anyone who loads it can chat. Two independent, opt-in controls let you lock that down.Domain locking
Restrict which websites are allowed to embed the widget. When enabled, Noxus emits aContent-Security-Policy: frame-ancestors header so browsers refuse to render the widget anywhere else.
Authentication
Remote key and secret URLs must use HTTPS and resolve only to public IP addresses. Redirects are not followed. For an internal-only on-prem key service, configure the PEM verification key or signing material through a workspace secret instead. Fetched key material is cached for 10 minutes per backend process; overlap old and new verification keys during rotation.
The public deployment app payload has a 60-second cache lifetime. Deployment edits and activation changes also invalidate that cache.
Reverse proxies and attachments
For a widget behind a pre-authenticating proxy, allow anonymous transport to the routes below. Noxus still validates the deployment credentials on protected widget API calls. Keep the platform’s/api/backend/* routes behind normal platform authentication.
The frontend server also needs internal access to
BACKEND_URL to resolve the widget’s framing policy. If that lookup fails, the widget returns a temporary error and cannot be embedded until the policy is available again. Validate the route list against the enabled features and customer proxy before rollout.
Upload request bodies are capped at 31 MB before multipart parsing, allowing room for a 30 MB file and its metadata. Configure the same request-body limit at the customer proxy or ingress so it does not buffer oversized requests before forwarding them. Forwarded client-IP headers must be overwritten or sanitized by a trusted proxy; the shared workspace upload limit does not depend on those headers.
An explicit deployment ID must identify an active widget for the requested agent. Invalid or inactive deployment references do not fall back to the agent’s legacy public-access setting.
Host page integration (signed token)
When Signed token mode is on, your embedding page supplies a token that Noxus validates on every request. Define a provider function before loading the embed snippet:window.NOXUS_EMBED_TOKEN = "<jwt>" is also supported, but a provider function is preferred because it can return a fresh token when the previous one expires.
Your backend mints the JWT after authenticating the user. Required and optional claims:
The token is delivered to the widget over
postMessage and sent to Noxus in an x-embed-token header — it never appears in the page URL.
Token usage: per request or session
Token usage decides what your token is for. The two settings are mutually exclusive — each accepts exactly one kind of credential, so there is no fallback between them.
Session mode also means your token-minting service being briefly unavailable no longer interrupts a live conversation — it is only consulted when a session ends, rather than every time a token expires.
Neither deadline logs the visitor out by itself. When a session ends, the widget
calls
NOXUS_EMBED_TOKEN_PROVIDER for a newly minted token and starts a fresh
session with it — the token it was holding is never reused for this. So these
two settings control how often your provider is asked again, which is what
makes them the bound on revocation: a visitor you still vouch for never notices
the rollover happened, and one you have stopped issuing tokens for is signed out
at the next one.
Nothing changes on your embedding page: you still supply NOXUS_EMBED_TOKEN_PROVIDER, and the widget simply calls it once at the start of a session rather than on every expiry. That is why the switch was safe to apply to existing widgets — no host-page change is needed. Conversation history is unaffected — sessions are still keyed to your token’s identity claim, so switching a live widget between the two settings keeps existing conversations.
Widget not loading? Check the browser console for
session exchange failed (401) and the response body for no subject found at claim 'sub'. Point Identity claim at the claim your token carries, such as an email, or set Visitor identity to None to mint an isolated session identity. Email mapping alone does not replace the configured identity claim during session exchange. In Per request mode, mapped workspace members can omit a separate subject claim.Revoking a user’s sessions
Mint a token for the user you want to cut off (the same signing key and claims as usual) and post it to the revoke endpoint. Every live session for that identity ends immediately. Not available when Visitor identity is None — there is no per-visitor id to revoke by, so bring the widget offline instead.{ "revoked": <number of sessions ended> }.
Ending the live sessions is only half of it: the widget answers a dead session by
starting a new one, so a revoked visitor still holding the token they were
revoked with would simply be issued another. Noxus therefore also refuses to
open a new session for that identity until you mint them a token again —
specifically, until it sees a token whose iat is later than the revocation.
Authenticate as a Noxus user (noxus_user)
Choose Noxus user when the agent should run as the visitor’s real Noxus account — it can read and act on everything that user can in Noxus. Authentication is a Noxus-issued JWT your integration obtains and relays as a bearer token; it does not rely on browser cookies (third-party cookies are blocked inside cross-origin iframes, so cookie-based sessions aren’t reliable here).
Noxus is the authorizer: the user consents, Noxus mints an ES256 access token (≈1h) signed with a platform keypair, and your page relays the access token to the widget. Each authorized client is revocable from Settings → Authorized clients.
Recommended: the Noxus consent popup (no backend, no CORS)
For a website with no backend, open the Noxus-hosted consent popup and wait for the token — the whole flow runs on the Noxus origin, so your page never makes a cross-origin call:origin against the deployment’s Allowed domains and delivers the token via postMessage scoped to that origin, so it can only reach the page you authorized. When the token expires, the provider is called again and re-opens the popup — silent if the Noxus session is still valid.
Alternative: server-side PKCE (browser extensions, host backends)
If you have a backend (or you’re a browser extension), run the PKCE flow and exchange the code server-side, then relay the access token the same way. This is the flow the Noxus Copilot extension uses.1
Authorize (PKCE consent, per device)
With the user signed in to Noxus, send them to the consent page with a PKCE
code_challenge and your redirect_uri. On consent, Noxus registers a device and redirects back with a one-time code.2
Exchange the code for tokens
access_token, refresh_token, and expires_in.3
Relay the access token to the widget
Authorization: Bearer; Noxus verifies the signature, checks the device is still active, and runs the conversation as that user.4
Refresh before expiry
Domain locking is recommended for
noxus_user but not required: a forged token fails signature verification server-side no matter where the widget is framed, so the JWT — not the frame origin — is the security boundary.Page context
A host page (e.g. a browser extension or your own app) can feed the agent what the user is currently looking at, so it can answer with that context in mind — the record open in your CRM, the article being read, the cart contents, etc.- Enable Accept page context from the embedding page in the widget deployment’s Access & security settings. It’s off by default; only turn it on for embeds you trust, since the context is client-supplied.
- From the host page, push context whenever it changes: